As I sit here up to my elbows in both fabric and used tissues, I'm wondering what it is, exactly that makes babies want to eat said dirty Kleenexes. The fabric I understand. It is, after all, brightly colored and pretty. It's the used tissues I don't get--and the used ones are apparently better than the clean ones, probably because I've yet to let her chew on one. And I'm thankful that they're not here today with the way I currently feel.
I'm not looking to get much done today. Everyone has a bad cold, including me. And my darling nieces are the culprit, because they had it first. The only thing I'm planning on doing is figuring out which sleeves belong to which dress, and label the dresses so that we know which dress belongs to whom. After all, as they are, they look *exactly* the same. Happy Thursday. I'm going to cuddle under an afghan, hibernate, and eat triple double oreos.
Thursday, January 26, 2012
Wednesday, January 25, 2012
Coat Progress!

At almost $9 a box, I'll be saving them just for projects like this--they're too expensive for general use, I think. And yes, that's one towel. It's a bath sheet with rolled ends.After the girls go home tonight, I'm going to attempt to sew together the outer coat shells. Gracie's has raglan sleeves, which means that my scraps will come in handy--it's not something that's in books, but raglan sleeves require reinforcement where all the seams meet at the arms. Otherwise, they rip out far too easily! (I learned this at my mother's knee, and she learned it from Grandma.) I can probably get the shells done tonight... hopefully. I haven't cut out the lining yet. I've been putting it off until the last minute, because I don't know exactly how the flannel-backed satin will react after it's cut. My best guess is that it will fray, so I purposely waited so it would have less chance to do it!
Tuesday, January 24, 2012
Monsters
In the past year, Bit has decided that there are scary monsters out to get her. At first, we played the game of squashing the monsters to make them go away. But the game was loud, and annoyed everybody else. And with Boo's birth we definitely needed something quieter. So I hit upon a solution. Did you know that monsters hate tickles? They're terrified of them! She's now convinced that tickling monsters makes them go away... even when she declares that she's a monster like she did today. ;) We ticked the monster away, leaving our sweet little girl in its place!
Monday, January 23, 2012
The problem with packing
Okay, right now, I have the coats and the dresses to finish, right? And I thought I had all the materials, too. Wrong! The very expensive vintage blue silk velvet ribbon I bought to trim the coats and matching hats is, at the moment, missing. Oh, I know where it is--in one of the bins in storage! Most likely, it will be found... in three months when everything gets moved back and my supplies go live in the black hole again.
That's the problem with moving. Things you knew where are aren't there anymore. I mean, the thread I bought to featherstitch the coats is gone, too! Ah, well, at least embroidery thread is cheap. And it's not like it'll never get used, anyway. I mean, I embroider. I have various colors of thread all over and all of it will eventually be used up.
I went on ebay and found a cheaper replacement for my ribbon. It's a rayon velvet ribbon, wider than the first. And while it's not as close of a color match, the darker blue should look good against the french blue of the coats and hats.
Found the thread! I have a couple shopping bags that I'm keeping in the house--they'll be put in the car and go with us on fumigation day--and it was in there. Now I don't have to buy it! ;) The cheapskate's law--buy it once and keep track of it!
Sunday, January 22, 2012
Pattern stash pack up

Perhaps I should have counted them like Peter did.Or think about displaying them like Tilly did. Instead, I sorted and organized them. Now, they're stuffed into two boxes in categories--Infant, 1/2 & 6 mos, 1, 2, 3, 4, 5, 8, out of print multi-sized, in print multi-sized, crafts, vintage multi-sized (I have several in multiple sizes... as in the same pattern just in two-five sizes, and I wanted to keep those 2-5 patterns together), and a small box of WIPs inside the top box that I'm planning to use in the near future. After the fumigation, I'm going to start saving for an actual filing system. Maybe it will end up being bins, I don't know. What I do know is that two rows of patterns fit in these moving boxes, and they're stacked two deep plus some on top! I have a feeling that there's probably at least 200 patterns in those boxes, easily!
The sewing closet is almost empty. My sewing cabinet has been emptied out. I have a few more caches to clean out, and then everything except what I'm working on right now has been put into storage. We still have a few closets to clean out, and my dresser is recently unblocked, (it had the contents of my bookshelves stacked around it in boxes!) so I should be able to finish this week. It's been a long process packing around the needs of a toddler and a baby!
Saturday, January 21, 2012
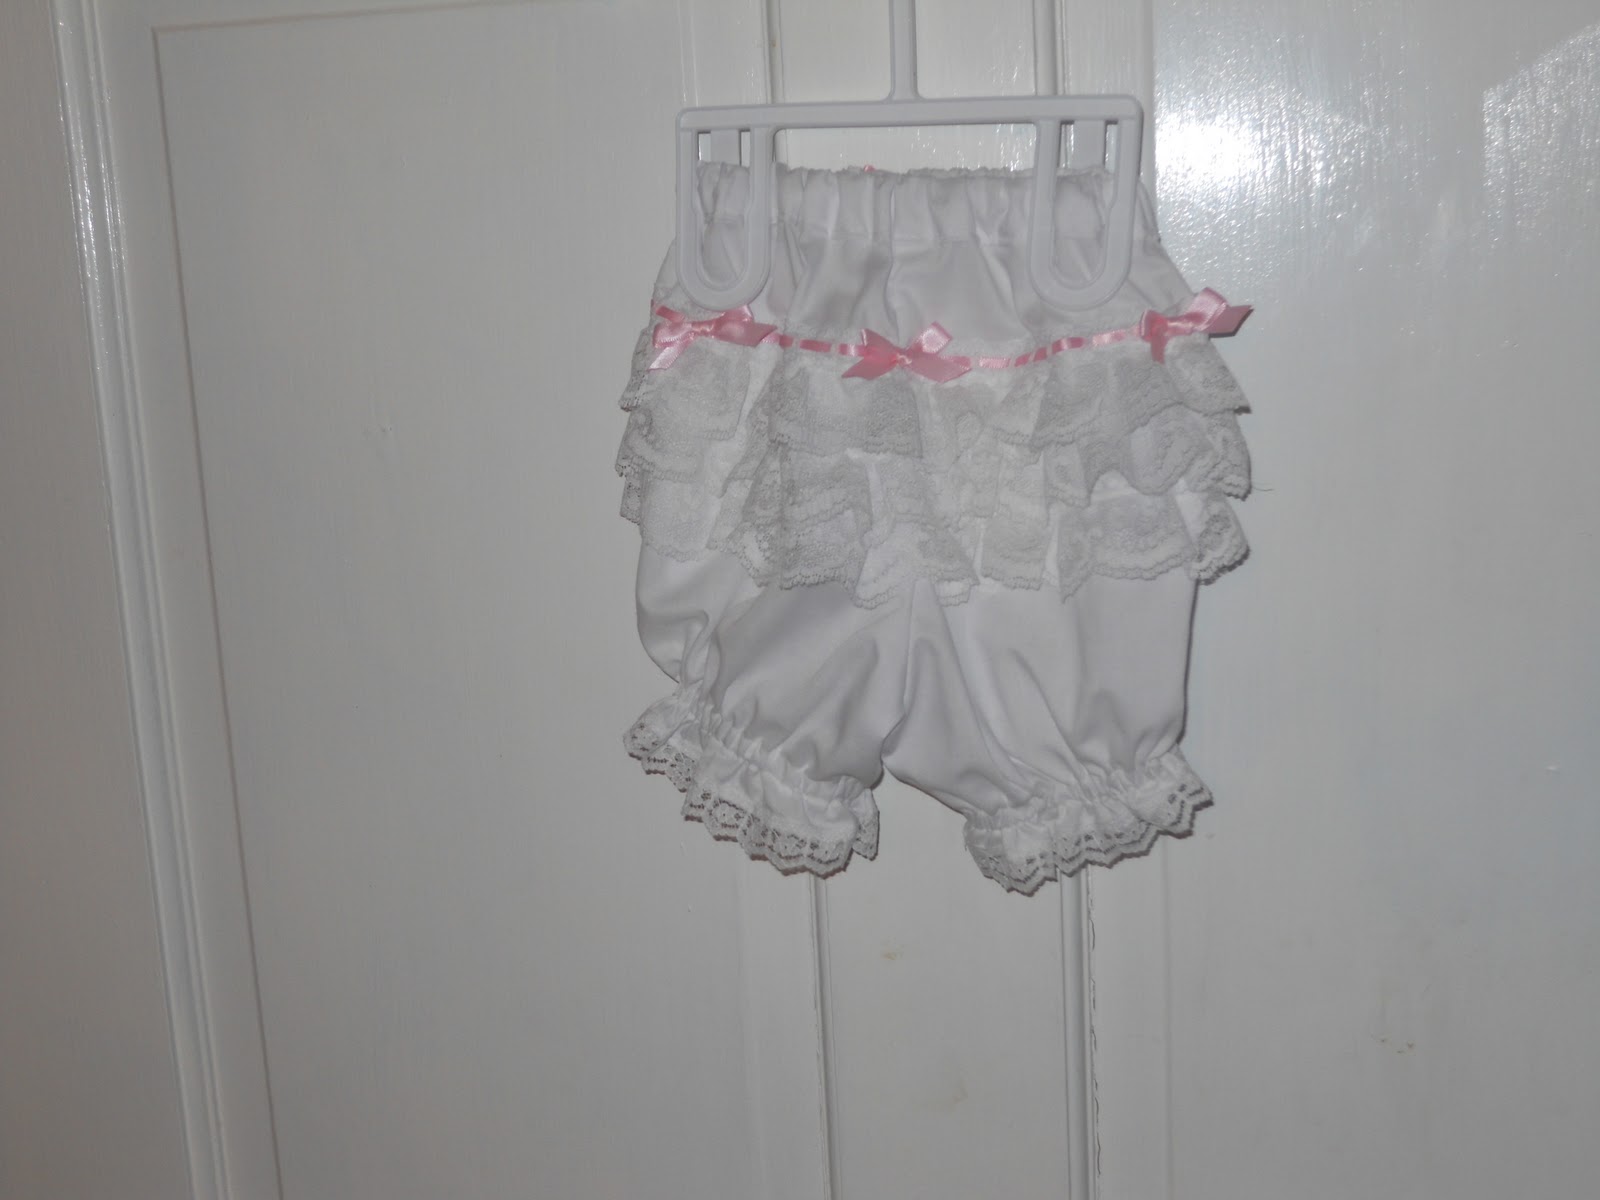
Tutorial: Transforming bloomers into functional panties

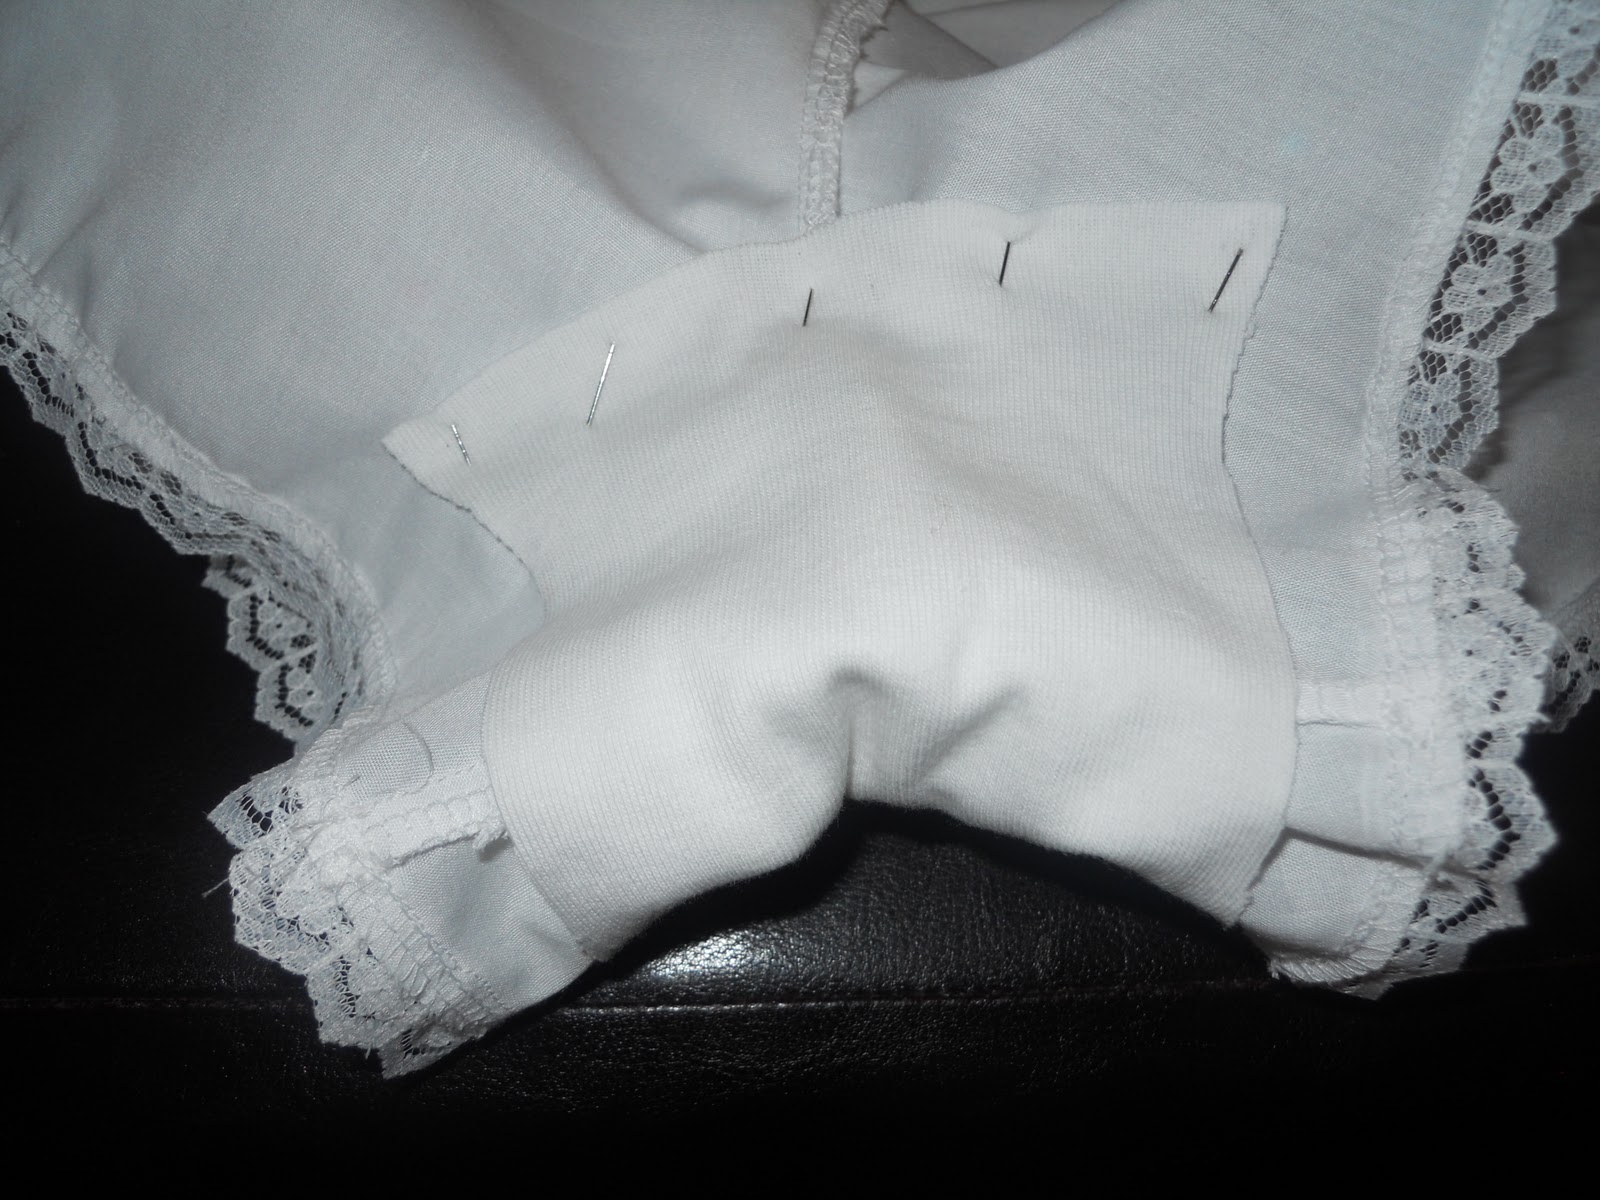
If your three-year-old is anything like mine, sooner or later, if she's wearing a dress, everybody will get to see the Care Bears panties she wore that day. So even though she's potty trained, I tend to still make either fancy knickers to go underneath, or matching ones. Examine the difference between the patterns and the RTW variety, and the main difference is that RTW panties have a double layer gusset between the legs.


My original thought was to sew the crotch seam first and not the side seams, but a bit of fiddling proved to me that for this pair, at least, that wouldn't work.

looking like this:
After a little cussing at it, I got it centered over the center seam of the panties, and pinned down. On the right side of the panties, I took my #4 double needle and stitched down on the needle line, locking the raw edges of the knit in place.

Thursday, January 19, 2012
What I never knew before about raising kids
 |
| Grandma, Boo, and Bit at the pumpkin patch |
A preface: biologically, I'm not a parent. But we've had Little Bit since she was three months old while her dad was in school and her mom worked, and now Boo has joined her while both their parents work. (For them, it's an economic necessity.) So while I'm Auntie Laura and my mom is Grandma, we've got approximately half shares in raising the girls because they're here a minimum of five days a week, nine hours a day.
1) You are no longer allowed to go to the bathroom alone. It's true. Bit is three and still has to come to talk to whoever is in the bathroom, and now that Boo is crawling, she follows you to the bathroom. As long as she's on the area rug at your feet while you pee, she's happy, but leave her with Grandma, and she gets mad!
2) If you want to sew because, after all, there are other responsible adults right there to help, and you're in the same room, anyway, be prepared for both children, who were happily playing a minute ago, to make a beeline towards you and either insist that you help them right now or the baby will come over to use your pants to pull up on and then want to be picked up. Really, the toddler wants to 'help' and the baby wants to watch, but since their versions of "helping" and "watching" involve touching.... especially that shiny needle on the sewing machine that goes up and down!
3) Whatever you have is better than what I have. It's true. For the most part, Bit is over this. But Boo has just started. And she only has two teeth... both on the bottom. It doesn't matter if you have the same thing, they want yours. Sit down with a drink, and the baby will try and pull herself into your lap so she can get a taste.
4) If you've been chasing the kids all day, and one is about to color (or stick stickers) on the walls while the other is yanking all the tissues out of the box, you're absolutely tempted just to let them do it so that you have ten minutes of peace and quiet...
5) Baby gates are like waving a red flag in front of a bull. They take it as a challenge to overcome. When we put the gate up, if one of us has to go in the blocked off area, the baby will sit in front of the gate a scream for the one they can't see. Because, after all, to an eight-month-old out of sight really is out of mind!
6) Looking at my girls, some people might report child abuse, because Bit tripped while I was in the bathroom and hit her face against the fridge and got a fat lip, and Boo is trying to learn how to walk and keeps falling and banging her head on the wood floors with the inevitable bruises that follow. I keep reminding myself that this too shall pass, and this leads to #6--people will give you dirty looks as if you were abusing your kid for yelling at them in public. Even panic yelling like " 'Insert full name here' you get back here RIGHT NOW. You know better to RUN in the STREET where a car can SQUASH you like a BUG!!!!" And here I thought I was being a good, safety-conscious Auntie!
7) Washing a baby's face is just as bad as water boarding them in their minds. This also follows for putting clean clothes on them.
8) No matter how many times I use a baby wipe to clean off the girls' faces, they still have to lick it to see if it tastes better this time. This holds for food that they don't like, too--they have to have some just to prove that it still doesn't taste good.
9) Paper, is, apparently, the most delicious substance on the planet if you're a baby because it's the one thing that Boo always tries to eat when she gets her hands on some.
10) Diapers are toys, not necessary apparel. And you can't leave dirty ones lying around, for even half a second, because the baby wants to taste them. After all, all her other toys go in her mouth!
I'm sure the next few years will bring more things I never knew, and I'll have to keep adding to the list!
Wednesday, January 18, 2012
The helpful years
Right now, Bit's favorite thing to do is to "help". Now being 3, her 'helping' doesn't always. Okay, so it doesn't most of the time! She does her best to pin patterns to fabric, help me sew, tend to baby sister (which Boo does not appreciate!), and generally 'help'. Today, we were moving boxes out of the house and into storage. And by the time the girls got here, we were working on the sewing supplies. I was sealing boxes of patterns and sending them out to the van when she showed up with, "What can I have, Aunt Laura?" As proud as proud can be, she carried small, light boxes (on purpose on my part) out to the van. And she was even prouder when she picked up the boxed sewing machine we picked up for her at a yard sale and carried it out. We're planning ahead, you see. Bit has been fascinated by sewing since she could crawl, and Boo seems to be following in her footsteps. So when we found a cheapie kids' my-first-Singer for $10 a couple years back, we bought it. We figure that even if we have to pay our repairman to service it to get it running perfectly, it's worth it.
 The helpful years, unlike the not being allowed to go to the bathroom alone stage, don't last long, so we figure that we need to use them to teach a few things. Like picking up her own toys, putting her trash in the garbage, putting her book collection away, and putting her dishes in the sink. Those are her 'chores' around here. We're teaching her to clean up after herself (which is something some people never learn) right along with sharing, alphabet, colors, and numbers. Yeah, I'm working on preschool curriculum with her. She tries so hard to read, I figure that since I have the background and know how to do it, I ought to teach her how to read!
Tomorrow, I have the day off... mostly. I'm going through my scrap bins and bags and sorting out what I want to keep and giving the rest away. And then I start sewing together the girls' dresses that go over the undies I just finished. After that, I need to finish the coats, and then retrieve some corduroy from storage for dresses. It's barely gotten cold here, so now it the time for warmer dresses for my nieces.

Tomorrow, I have the day off... mostly. I'm going through my scrap bins and bags and sorting out what I want to keep and giving the rest away. And then I start sewing together the girls' dresses that go over the undies I just finished. After that, I need to finish the coats, and then retrieve some corduroy from storage for dresses. It's barely gotten cold here, so now it the time for warmer dresses for my nieces.
Tuesday, January 17, 2012
Sewing Terms: Continuous Lap

The original instructions I found last year had you pinning bias tape along the slash in the fabric in a straight line and then sewing it down. I've since found some that take in account the fact that a slash is, essentially a "V", and avoids the slight gathering that happens with the way I've done it here.


It's now ready to attach to the bodice or cuffs of your garment.
Monday, January 16, 2012
Miss Piggy on PR
I'm looking forward to PR this week. I bet that Miss Piggy karate chops one of the designers!
Brilliant Basics: Darts


Be sure to leave long tails of thread on both sides, because you'll need them for the next step.

After this, you have to iron it. This will smooth out your seams, and can even help correct the tops of your darts a little if you've messed it up a bit.
The ironing is really the last step. I mean, you have to watch when you're sewing to keep everything where you've ironed it, but otherwise, you can move on in constructing your garment.

And after sewing up the rest of the slip, here's the result--a full skirted 1950s slip to go under Bit's dresses! (The 50s half slip, the crinoline slip, and the does-this-make-my-butt-look-big panties are under it in this picture, too. Evie calls it her "ballerina dress".)
Saturday, January 14, 2012
Progress and plans

In the midst of packing, I managed to sew the continuous lap on the skirt of the over slip, get the darting done on the slip bodice, and sew the various bodice bits together. I also started the process of refinishing Bit's new-to-her child's table and chairs. (And yes, that's a Cookie Monster bow on Penny's head!)
I also tested the replacement paint tubes by painting another white onesie that I had laying around. This time, they work well, so I don't have to return anything. Tomorrow, well, I thought maybe we'd talk about continuous lap, because it's pretty much an unfamiliar term that doesn't show up much in modern sewing, but it does in vintage! The only modern, big 4 pattern that I can think of that mentions it is McCalls 4424. It does, however, show up in some 'heirloom' patterns and quite a few vintage patterns. And truthfully, I'd rather avoid doing it because it's a pain and I don't like the gathers that result at the bottom on the lap. More about that tomorrow, though!


Friday, January 13, 2012
Not sewing, but...
Today, I mended the lid of the toilet tank. Which is why I'm not sewing tonight--my living room/sewing room stinks to high heaven from the epoxy and ceramic repair stuff. The end result isn't all that pretty, but we cover it up anyway, so it doesn't matter. The Gorilla Glue I stuck it together with originally just wasn't cutting it--it had come apart. In fact, when I tried to pick up the big pieces, one of the smaller ones fell out! My brothers broke it last year when they had to pull the toilet up to put on a new wax ring. Hopefully, this new stuff will hold. It's supposed to be waterproof (yay!) and made for ceramic and porcelain. Hopefully, we'll be back to sewing tomorrow, and I have (for cuteness) pictures and videos of Boo in her new Cookie Monster shirt!
Thursday, January 12, 2012
Good intentions
I meant to sew up Bit's slip today and talk about how to get perfect, non-nippley darts, but instead, I spent the day sleeping. I'm fighting a bit of a cold and some flu symptoms, so I slept instead of sewed. I'm feeling a bit better now, though, so tomorrow we'll talk about darts, and this weekend will be about sewing t-shaped yokes.
Tuesday, January 10, 2012
A "Duh" Moment
If you're like me, you have moments in sewing when you get an epiphany and smack yourself upside the head because you just discovered something so obvious that you wonder why it took you so long to see it clearly. This one was a couple years back when working on Simplicity 2629. See, it's a vintage reprint of a 1948 layette pattern. And it has embroidery. Lots of embroidery. So I got a ink transfer pen and transferred the embroidery pattern. And then it came time for the knife pleats. Until then, no matter how hard I tried with tucks and pleats, out of a set of ten one would end up crooked. It drove me nuts! So here I am, having just heat transferred the embroidery design, staring at the transfer pen when it hit me. Transfer the dang marks! After all, the pleat lines are clearly marked on the pattern, and it would even give me a line to sew on.
 As time has passed, I learned that transfer paper is a better way to go, and that it also works for darting and any other sort of pattern marking that ends up being essential. (Ink bleeds through light colored fabric. And it's permanent. These wash out and come in different colors in the same package for different color fabric)
So today, after finishing Bit's pettiskirt (more on that and the crinoline slip tomorrow) I cut out her slip and put that old "duh" moment to use and transferred the dart markings.
 Okay, so here's the cut out pieces of both the slip and panties. I also have a piece of cardboard for extra support (and to know where to line everything up to!) the transfer sheets, a mechanical pencil, a ruler, and a chopstick.
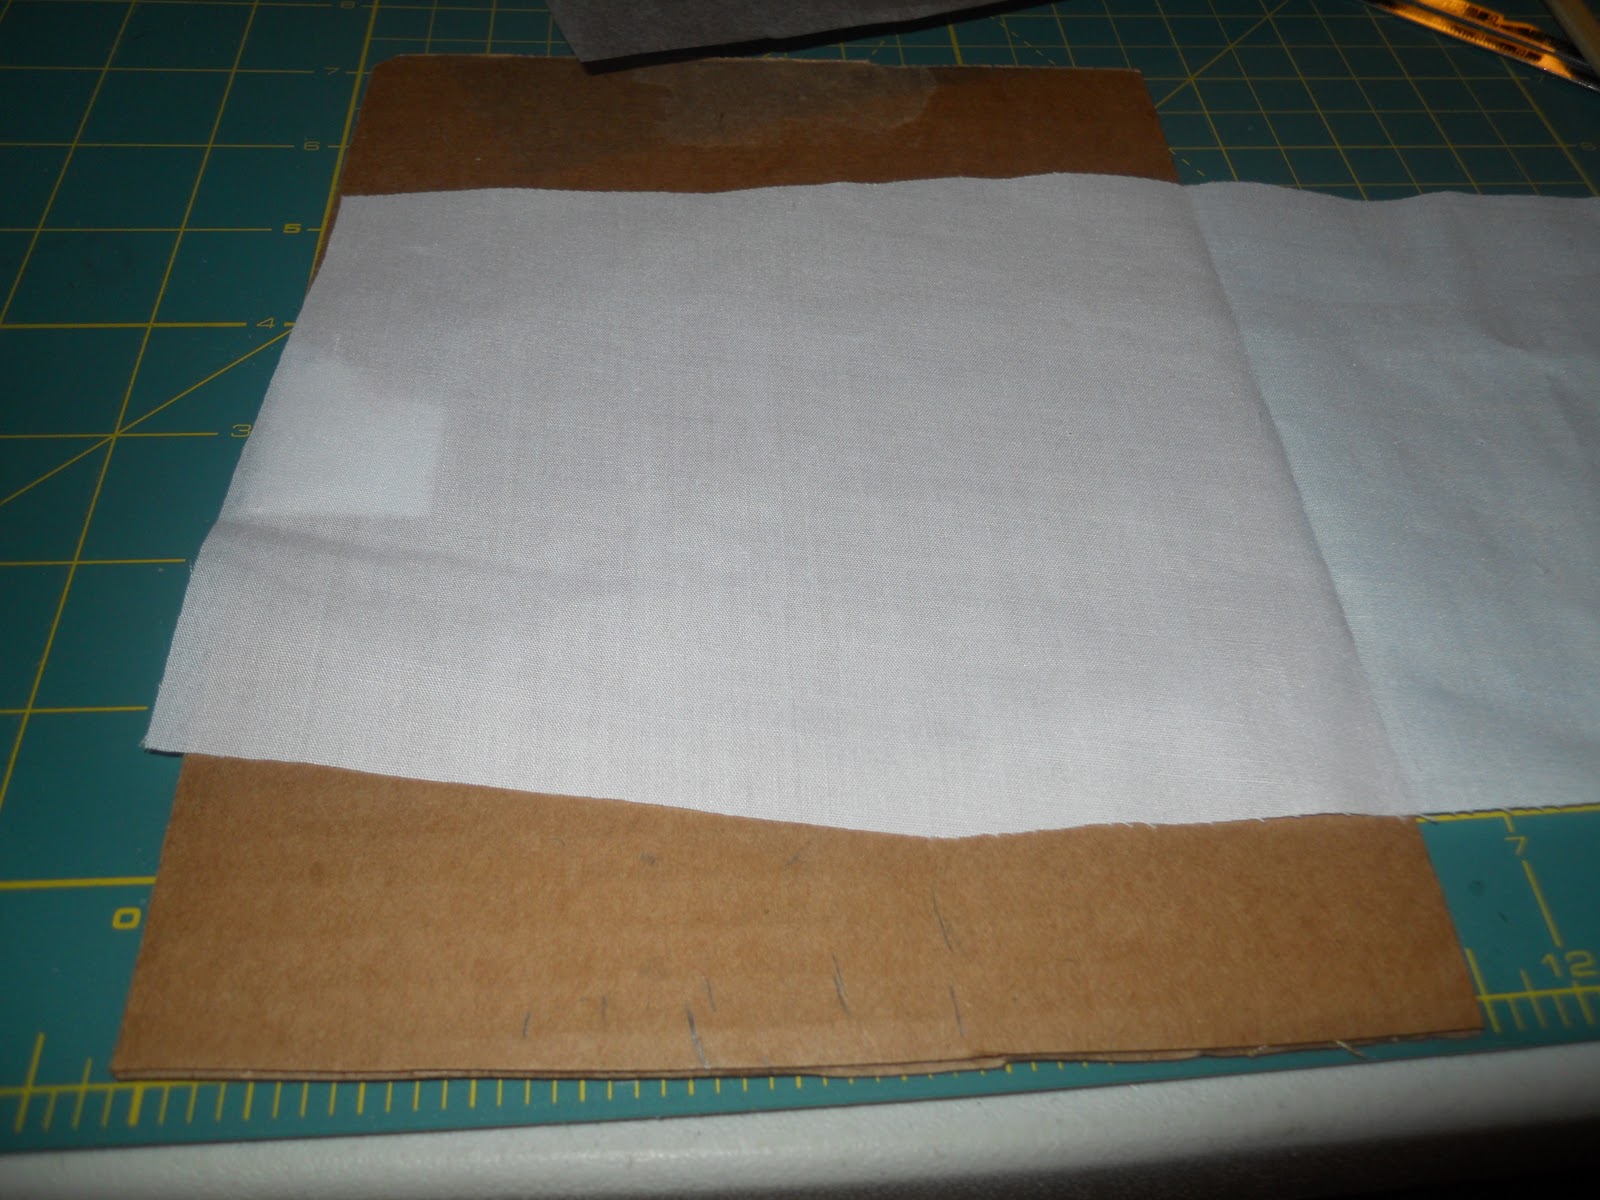
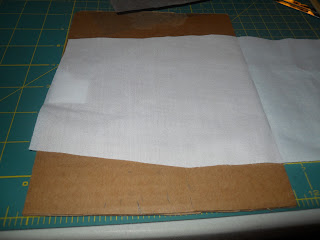 I purposely don't iron the front bodice of things until later, because it gives me a center line to work from, and this is no exception. I lined that line up against the straight cardboard edge, and then lined the paper up against that. The pattern piece goes on top of that, with the cardboard giving you a nice, straight edge to keep everything in the right place and straight.
 The next step is to take the chopstick and mark over the dots. When you could take the seam gauge (aka the only ruler I could locate because the others are packed) and go over the lines, you'll get clearer, more accurate lines if you wait.
 Graphite washes out, so a common, everyday mechanical pencil is my marking tool of choice. Line up the dots with the ruler and draw in your dart line. Now, repeat with your other side and any other markings you care to transfer.
 Now you have perfect markings. Pin along them, follow the lines on them to sew the darts, pleats, or tucks, and you get perfect results every time.
I also transfer placement lines for things like ruffles on ruffle butt panties, and sometimes button hole markings, too!
And one more, a bonus "duh" moment. For perfectly placed collars on back button pieces, also leave in the fold mark--at least temporarily. Sew the shoulder seams together, sew and turn the collar pieces, and then bar tack them together. Then place the bar tacked collar pieces on the center fold line and start pinning. Sew it and you've got a perfectly placed collar!

So today, after finishing Bit's pettiskirt (more on that and the crinoline slip tomorrow) I cut out her slip and put that old "duh" moment to use and transferred the dart markings.


I also transfer placement lines for things like ruffles on ruffle butt panties, and sometimes button hole markings, too!
And one more, a bonus "duh" moment. For perfectly placed collars on back button pieces, also leave in the fold mark--at least temporarily. Sew the shoulder seams together, sew and turn the collar pieces, and then bar tack them together. Then place the bar tacked collar pieces on the center fold line and start pinning. Sew it and you've got a perfectly placed collar!
Sunday, January 8, 2012
Experimentation


My next experiment was in color layering, and I chose to keep a few more stencil characteristics. I'm not sure this was entirely successful, and I think I need to go back to the roses and fill in the gaps with a lighter yellow. I don't like the red, either--it's too orange, but I couldn't get the Cherry red from the jewel tone set to start. It's defective, so I'll be sending it back to Amazon for a replacement.
Gracie has a shirt with Cookie Monster on it that says "'G' is for GRACIE", so I thought it only fair that Nikki had one, too. Lucky for me, I had a Cookie Monster patch hanging around, so I didn't have to try and free hand him. And letter stencils from the sign I made for my flower garden last spring. I can put them on Nikki Thursday, because they have to sit for at least 48 hours so they don't come off. And, well, I'd rather wait a bit longer to be sure.
I'll probably experiment more later, but these don't look bad for a first try!
Saturday, January 7, 2012
Ruffle-butt panties and making a slip without a slip pattern
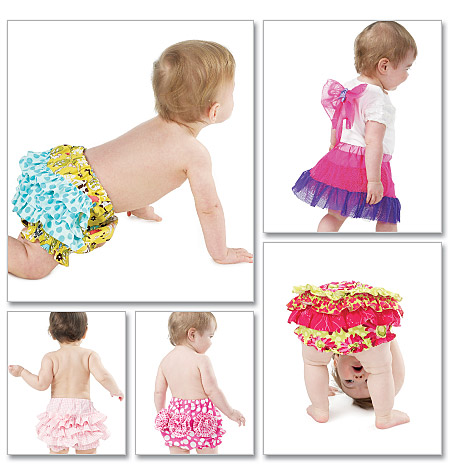
I end up making lots of diaper covers to go under dresses. It's not something you can buy at the store, and they look much better than having a diaper hanging out from underneath dresses! Why not make 'em lacy and ruffly?

Now, really-o truly-o slip patterns are few and far between. And buying them is kind of hard. I can't find them much in stores anymore--it's like manufacturers have decided that nobody but old ladies wear slips anymore. There isn't a current pattern, either, and the dress I'm working on needs one. I have patterns for A-line slips for infants, (and for toddlers, too, truth be told, because they're in my vintage pattern collection) but I wanted something prettier!


This will match Bit's proposed slip, too. The only difference is it doesn't have darts and it's a lot smaller! And just to show how full the crinolines will make the dress, here's all of the slips and crinolines together!

;) Looks like what might go under a ballgown! One thing you do have to watch for is that the slip should be at least one inch shorter than the dress it's intended to go under. Which, for me, means that I just have to make sure that the dress is longer than this!
Bit's undies are currently pinned together on my sewing table, so I'll post in-progress pictures later today. I tend to sew together everything I can before switching to the serger!
Friday, January 6, 2012
Crinoline slips and pettiskirts on a budget

Sometime in October, I had an epiphany--the girls needed crinolines and pettiskirts to give their full dresses the necessary poof. So I started looking.... and found lots of them for around $30. Which, naturally, made thrifty me puke! $30 for some organza? No way, José! So I poked around ebay and found some poly mirror organza for around $2.75/yard. And then I went into my pattern collection for a tiered dress pattern. I used Simplicity 5956 for the infant version, because it has buttoned shoulders and didn't need much in the way of adjustment to work as a slip. I think it's either a 70s or an 80s pattern, but really almost any tiered dress pattern works for this. I decided the bodice should be lined for ease of sewing (I'm lazy and hate bias binding!) and that it desperately needed interfacing for the buttonholes. I made two skirts instead of one for added fluff, but otherwise pretty much followed instructions.


I also made a regular slip so that the 1/4 inch entredeux would just show white through it, and ruffle-butt panties, but more about those after the girls go home.
Monday, January 2, 2012
New Year Goals
I refuse to call them resolutions, because I rarely manage to follow through on those. And I want to follow through.
1) More sewing, less planning. And that includes fabric buying. (I think I have enough, don't you?) I have a tendency to plan ten projects ahead of where I'm sewing. While that means that I always know what's next, it also means that I've acquired the supplies for projects hat I sometimes never get to!
2) Get organized. I've made some headway on this one. And hopefully, it'll help with #1.
3) Finish last year's UFOs. It's not as bad as it sounds. That means I need to finish the coats and the Christmas dresses. The hard part is just getting started!
4) Make what I've already promised to make. That means that I need to get off my keister and make dresses for the girls. I have the fabric, patterns, and notions, after all! And overalls for both, and jeans for Bit. The jeans have been promised for over a year!
5) I've had the Penny's and Alina's quilts mapped out for a year. I need to make those, too! It is, after all, what the matched sets of fabric I purchased are for!
That's just about it. This year, I also intend to start the handmade Christmas presents around June, and the kids' birthday presents around February. That way, I won't be scrambling at the last minute. So what do y'all have planned for the new year? What are your goals, or dare I say it, resolutions?
Sunday, January 1, 2012
Organizational progress
HAPPY NEW YEAR!

After a long day of going after more bins when I ran out of space, and ferrying boxes and bags of fabric back and forth, here's my result! Yes, it's still cluttered as anything, but by the time I'd sorted through all of it, I was too tired to get it back in the closet, so my brother helped. Next weekend, I'll arrange it better, so I can actually get into the closet. The bags are mostly scraps, which I need to go through and decide what's big enough to keep and what needs donated on freecycle.


And that's the rest of the mess in my room. Mainly patterns, with a bit of fabric and notions thrown in for good measure. But, alas, it's not the end of my organizational nightmare. I have two large boxes (think large moving boxes) of donated fabric to go through, my desk is a nightmare of patterns and small notions, and some of my supplies are also currently in the bonus room! So I'll fix it all--eventually.
In the meantime, how do y'all store your patterns? I've outgrown last year's filing system and patterns are piling up everywhere!
Subscribe to:
Posts (Atom)